WS 2016 Forced password change at next logon le mot de passe de l'utilisateur doit être modifié avant la première connexion
Forced password change at next logon and RDP
If your AD account has the “User must change password at next logon” option enabled:
and you try to logon to a RDP session (with correct credentials):
you might encounter this error message:

“You must change your password before logging on the first time. Please update your password or contact your system administrator or technical support.”
This is a classic catch 22 issue: You have to logon to change you password, but you cannot logon until you’ve changed you password.
If you have access to a “normal” network connected Windows client you can change the password that way, but what if you only have RDP access?
Client side
Well, if the server allows it, you can temporary disable “Credential Security Support Provider (CredSSP)” in the RPD client. This disables Network Layer Authentication, the pre-RPD-connection authentication, and therefore enables you to change your password via RDP. CredSSP is enabled by default in the RDP client on Windows Vista and forward.
There is no option to disable CredSSP in the RDP client, so here is how you have to do it:
- Start mstsc.exe
- Click Show Options
- Click Save As
- Call it ChangePassword.rpd (or anything you’d like, but avoid the name Default.rdp)
- Open the saved ChangePassword.rpd in Notepad
- Add a new row at the end with the following text:
enablecredsspsupport:i:0
- Save the rdp file
- Double-click the rdp file
- Enter the name/IP of a domain connected computer with RDP enabled
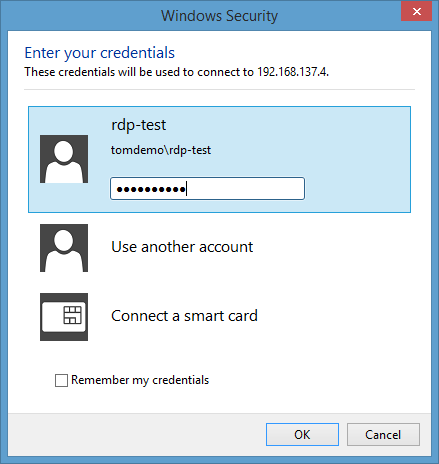
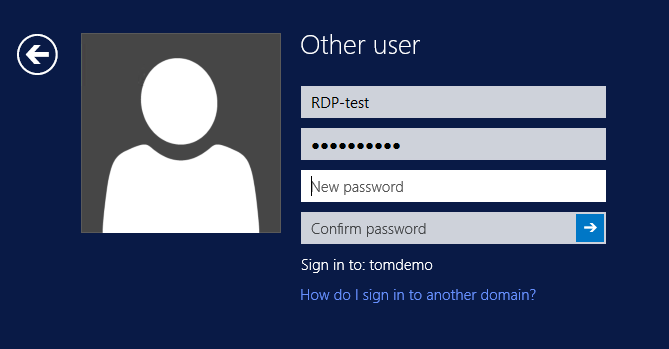
Instead of the local Windows Security prompt (the second image in the blog post) you should see a Windows Logon screen on the remote computer (if not, read on anyway):
If the account you log on with at this point has the “User must change password at next logon” option enabled, you get notified about that:
By clicking OK you get the possibility to change the password (yay!):
After changing the password you get confirmation about the change:
Clicking OK logs you in.
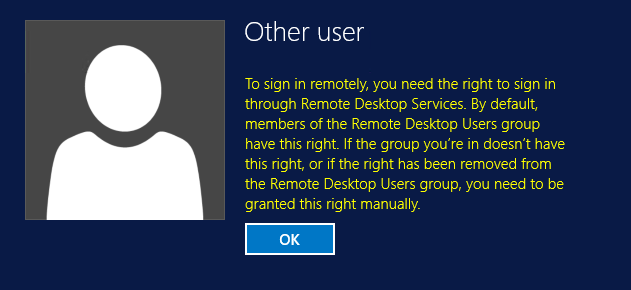
In fact, you do not need to have access to sign in through RDP, in that case this shows up, but only after you successfully changed your password:
Delete the ChangePassword.rdp file when you are done (or at least do not use it until you are forced to change your password again), since disabling CredSSP lowers the security of RDP connections.
If the server requires CredSSP
If the server does not allow you to disable Credential Security Support Provider, you get this error message when connecting:
In that case, try connecting using the FQDN (DC01.tomdemo.se and not only DC01) or connect to other servers that might allow you to disable CredSSP. As I mentioned above, you don’t have to have access to actually logon to the server.
Server side
You can also disable CredSSP on the server side, but since that lowers the security on all RDP connections to that server it is not recommended.
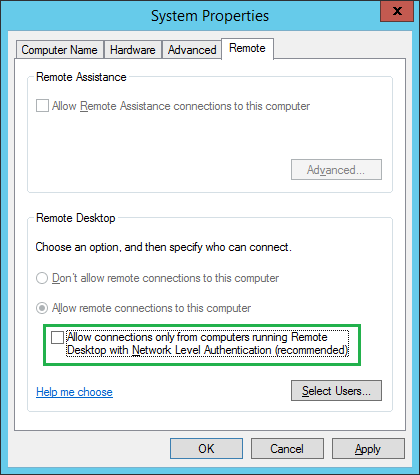
If you chose to do this anyway, you do it either by de-selecting “Allow connections only from computers running Remote Desktop with Network Level Authentication (recommended)” in System Properties:
Or if you run the Terminal Server Role:
- Open Terminal Server Configuration
- Open RDP-Tcp configuration page
- On the General tab, set the Security Layer to RDP Security Layer
Note that if you already have an existing access to a server (with the account you need to change the password with) you could just change your password in that session by pressing Ctrl-Alt-Del (or Ctrl-Alt-End in an RDP connection) and choosing Change a password:
I hope this post helped.


Commentaires
Enregistrer un commentaire